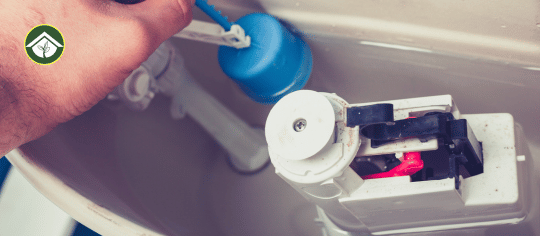
Is your toilet constantly running or not flushing properly? The problem might be your flush valve.
Replacing your toilet’s flush valve can save you money on water bills and improve your bathroom’s performance. If you’ve never done it before, it might sound tricky, but it’s easier than you think. You’ll discover everything you need to know about toilet replacement flush valves—how to spot the signs, choose the right one, and install it yourself.
Keep reading to take control of your toilet and stop wasting water today.
Signs You Need A New Flush Valve
Knowing when to replace your toilet’s flush valve can save water and prevent damage. A flush valve that does not work well can cause many problems. These signs show you need a new flush valve soon.
Constant Running Toilet
A toilet that keeps running is a common flush valve issue. It means water flows non-stop into the bowl or tank. This wastes water and raises your bill. A new flush valve can stop this problem quickly.
Weak Or Incomplete Flush
A weak flush does not clear the bowl properly. Sometimes, water does not flow fast or strong enough. This happens when the flush valve leaks or blocks. Installing a new valve helps restore full flushing power.
Water Leaks In The Tank
Water pooling inside or around the tank signals a leak. The flush valve seal might be broken or cracked. Leaks cause water damage and waste. Replacing the flush valve fixes leaks and saves water.
Unusual Noises During Flushing
Hissing or gurgling sounds during flushes are not normal. These noises often come from a faulty flush valve. They mean air or water is escaping. A new flush valve stops strange sounds and improves toilet function.
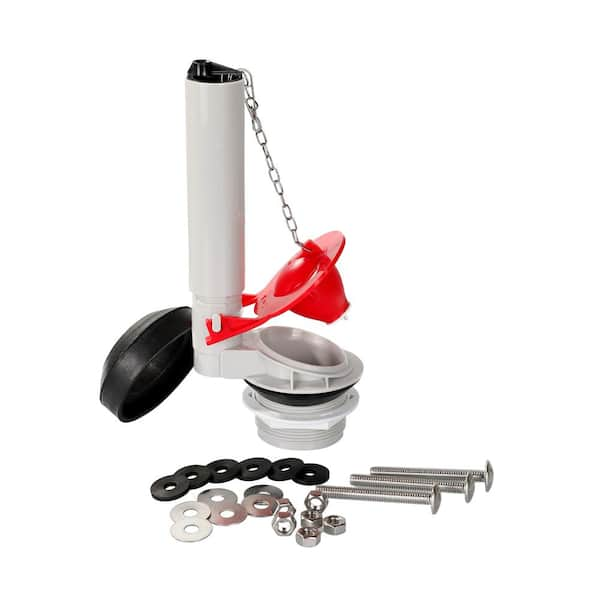
Credit: www.homedepot.com
Types Of Flush Valves
Flush valves play a key role in how your toilet works. They control water flow from the tank to the bowl. Choosing the right type affects your toilet’s performance and water use. Understanding the main types helps you pick the best option for your needs.
Standard Flapper Valves
Standard flapper valves are the most common type. They use a rubber flap to seal the tank. When you flush, the flapper lifts to release water. It then falls back to close the tank. These valves are simple and easy to replace.
Canister Style Valves
Canister style valves have a large cylinder that lifts straight up. This design allows water to flow quickly and evenly. Canister valves help toilets flush with more power. They are common in newer, high-efficiency models.
Dual Flush Valves
Dual flush valves offer two flush options. One uses less water for liquid waste. The other uses more water for solid waste. This helps save water without losing flushing power. Dual flush valves are eco-friendly and cost-effective.
Pressure-assisted Valves
Pressure-assisted valves use air pressure to boost flushing power. They push water into the bowl with force. This type works well in commercial or heavy-use toilets. Pressure-assisted valves reduce clogs and improve cleanliness.
Tools And Materials Needed
Replacing a toilet flush valve requires the right tools and materials. Having everything ready makes the job easier and faster. This section lists the basic tools and supplies needed for a smooth replacement process.
Basic Plumbing Tools
Start with a few essential plumbing tools. A wrench or adjustable pliers help loosen and tighten bolts. A screwdriver is needed for removing screws on the tank lid or flush handle. A utility knife can trim any old seals or gaskets. These tools are common in most homes.
Replacement Flush Valve Kits
Flush valve kits include all parts needed for the replacement. Kits usually come with a new flush valve, flapper, and overflow tube. Choose a kit that fits your toilet model. This avoids compatibility problems and extra trips to the store.
Sealants And Gaskets
Sealants and gaskets prevent leaks around the flush valve. Use plumber’s putty or silicone sealant to create a watertight seal. New rubber gaskets fit between the tank and bowl. Replace old or cracked gaskets to stop water leaks and ensure proper function.
Cleaning Supplies
Clean the tank and flush valve area before installing new parts. Use a sponge or cloth to remove dirt and grime. A mild cleaner or vinegar solution helps remove mineral buildup. Clean surfaces help new seals stick better and improve valve performance.
Step-by-step Flush Valve Replacement
Replacing a toilet flush valve can fix leaks and improve flushing. The process is simple and does not need special tools. Follow these clear steps to change the flush valve safely and quickly.
Shutting Off Water Supply
Find the water supply valve near the toilet base. Turn it clockwise to close it. This stops water from entering the tank. Flush the toilet to empty most of the water.
Draining The Toilet Tank
Hold the flush lever down to drain the tank fully. Use a sponge or towel to soak up leftover water. Remove all moisture to avoid spills during replacement.
Removing The Old Flush Valve
Disconnect the water supply line from the tank bottom. Unscrew the tank bolts and lift the tank from the bowl. Locate the flush valve inside the tank. Unscrew the lock nut holding the flush valve. Remove the old valve carefully.
Installing The New Flush Valve
Place the new flush valve in the same position. Tighten the lock nut to secure it firmly. Reattach the flapper chain to the flush lever. Make sure the flapper can open and close freely.
Reassembling And Testing
Put the tank back on the bowl. Tighten the bolts evenly to avoid leaks. Reconnect the water supply line. Turn the valve counterclockwise to let water flow. Flush the toilet several times to check for leaks and proper function.
Common Issues During Replacement
Replacing a toilet flush valve can seem simple but often brings common challenges. These issues can delay the process and cause frustration. Knowing what to expect helps you prepare and fix problems fast.
Many homeowners face stubborn parts stuck tight. Others struggle to get the seal right. Adjusting the flush valve height also needs care. Leaks may appear after installation, needing quick fixes.
Dealing With Stubborn Parts
Old flush valves often have parts that won’t budge. Rust and mineral buildup cause tight seals. Use a wrench with gentle force. Apply penetrating oil and wait a few minutes. Avoid using too much force to prevent damage.
Ensuring Proper Seal
The flush valve must seal completely to stop leaks. Clean the valve seat before installing the new valve. Check the rubber gasket for cracks or wear. Replace the gasket if damaged. Tighten bolts evenly to avoid uneven pressure.
Adjusting Flush Valve Height
The flush valve height must fit your toilet tank. Too tall or short causes poor flushing or leaks. Follow the manufacturer’s instructions for correct height. Use a measuring tape to check before final tightening. Adjust carefully to keep the chain slack.
Fixing Leaks After Installation
Leaks often happen at the flush valve base or around bolts. Tighten bolts slowly and evenly to stop leaks. Replace worn washers or gaskets. Check the water level inside the tank. Lower the water level if it spills over the overflow tube.
Maintenance Tips For Flush Valves
Maintaining your toilet flush valve helps keep your bathroom working well. A well-kept flush valve stops leaks and saves water. Small efforts can prevent big repairs and save money. Follow these simple maintenance tips to extend the life of your flush valve.
Regular Cleaning
Clean the flush valve every few months. Use a soft cloth to wipe away dirt and grime. Avoid harsh chemicals that can damage parts. A clean valve works smoothly and lasts longer. Pay attention to the valve seat and surrounding areas.
Checking For Wear And Tear
Look for cracks or worn parts regularly. Check the flapper and seal for damage. Replace any broken or soft parts quickly. Worn components can cause leaks or poor flushing. Routine checks help spot problems early and keep your toilet running well.
Replacing Flapper Components
The flapper often wears out before other parts. Replace the flapper every 1-2 years or if it leaks. Choose a flapper that fits your flush valve model. A new flapper ensures a tight seal and stops water waste. Changing it is simple and saves water bills.
Preventing Mineral Buildup
Hard water can cause mineral deposits on the valve. These deposits block water flow and reduce performance. Use vinegar or a mild cleaner to remove buildup. Soak parts in vinegar for 30 minutes if needed. Keep the valve clear to maintain strong flushing power.
When To Call A Professional
Knowing when to call a professional for a toilet replacement flush valve saves time and frustration. Some problems are easy to fix, but others need expert help. Recognizing the signs helps avoid bigger issues.
Persistent Leaks
Leaks that do not stop after several attempts to fix need professional attention. A plumber can find hidden problems causing the leak. Persistent leaks waste water and increase your bill. Early repair prevents damage to your bathroom floor.
Complex Plumbing Issues
Some flush valve problems involve complicated plumbing systems. If you see water pooling around the base or hear strange noises, call a plumber. Professionals have tools and skills to handle tough issues safely. They ensure everything works correctly without causing other problems.
Upgrading To High-efficiency Models
Installing a high-efficiency flush valve can be tricky. Professionals know how to fit these models without leaks or malfunctions. They help you choose the right valve for your toilet. A proper installation saves water and lowers your utility bills.
Credit: baileyokc.com
Frequently Asked Questions
What Is A Toilet Replacement Flush Valve?
A toilet replacement flush valve controls water flow from the tank to the bowl. It releases water during flushing, ensuring proper waste removal. Replacing a faulty valve improves flush efficiency and prevents leaks or running toilets. It’s a common part needing replacement over time.
How Do I Know If My Flush Valve Needs Replacement?
Signs include constant running water, weak flush, or water leaking into the bowl. If your toilet takes too long to refill or you hear continuous water flow, the flush valve might be damaged or worn out. Inspecting the valve can confirm if replacement is needed.
Can I Replace A Flush Valve Myself?
Yes, replacing a flush valve is a manageable DIY task with basic tools. Turn off the water supply, drain the tank, remove the old valve, and install the new one. Follow manufacturer instructions carefully for a proper fit and avoid leaks.
What Tools Are Needed For Flush Valve Replacement?
You typically need an adjustable wrench, screwdriver, sponge or towel, and possibly pliers. Having a bucket handy helps catch excess water. Some flush valve kits include specific tools, so check the instructions before starting the replacement.
Conclusion
Replacing a flush valve can save water and stop leaks. It keeps your water damage toilet working well and avoids waste. The process is simple and cost-effective. You don’t need special tools or skills. A good flush valve helps your toilet flush better every time.
Regular checks can prevent bigger problems later. Choose a valve that fits your toilet model. Clean, smooth flushing makes your bathroom more comfortable. Small fixes like this improve your home’s value and comfort. Take action today and enjoy a quieter, cleaner flush.


Leave a Reply