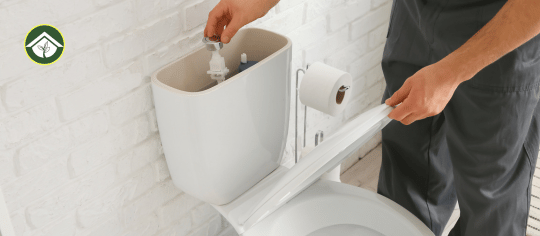
Your toilet tank might not be the first place you think of when cleaning, but it plays a huge role in keeping your bathroom fresh and functioning properly. Over time, mineral deposits, mold, and grime can build up inside the tank, causing issues like bad smells, staining, or even poor flushing.
If you want a cleaner bathroom and a toilet that works like new, knowing how to clean your toilet tank is key. Keep reading, and you’ll discover simple, effective steps to tackle this hidden problem—no special tools or harsh chemicals needed.
Your toilet will thank you!
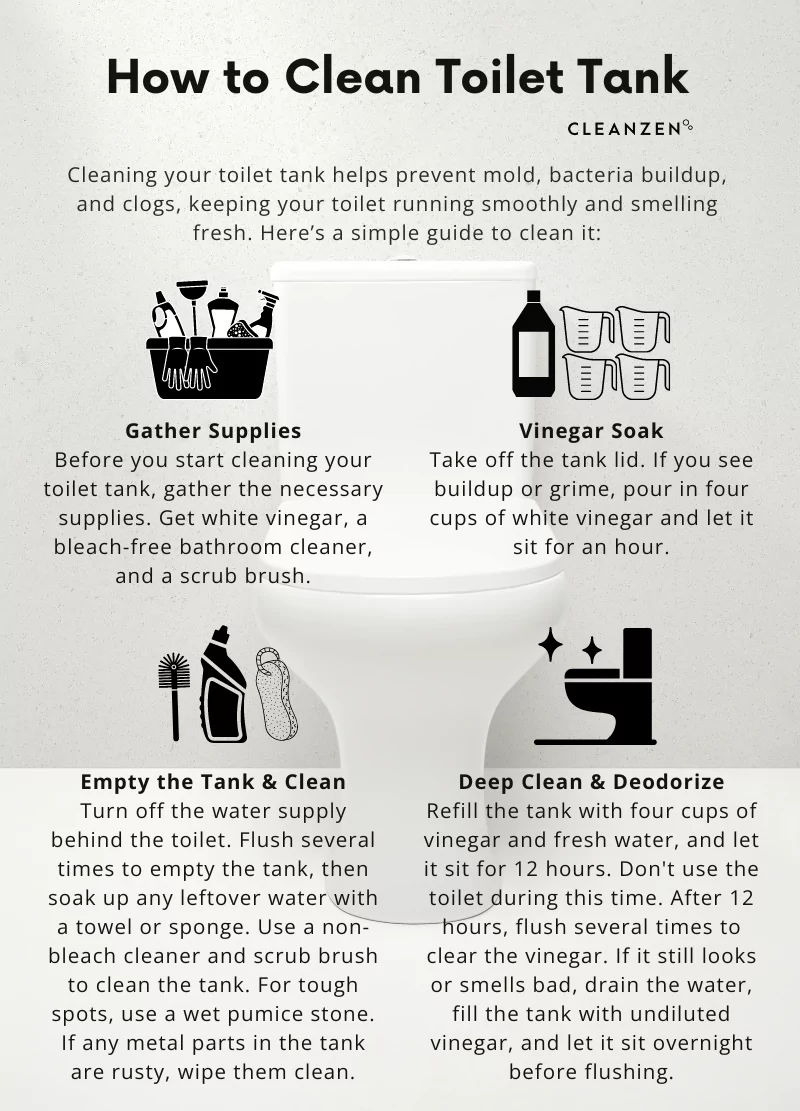
Credit: cleanzen.com
Why Clean The Toilet Tank
Cleaning the toilet tank is often overlooked. Dirt and grime build up inside silently. This affects your bathroom’s hygiene and function. Knowing why cleaning the tank matters helps keep your toilet fresh and efficient. It also saves money on repairs. Let’s explore the key reasons to clean the toilet tank regularly.
Preventing Odors And Stains
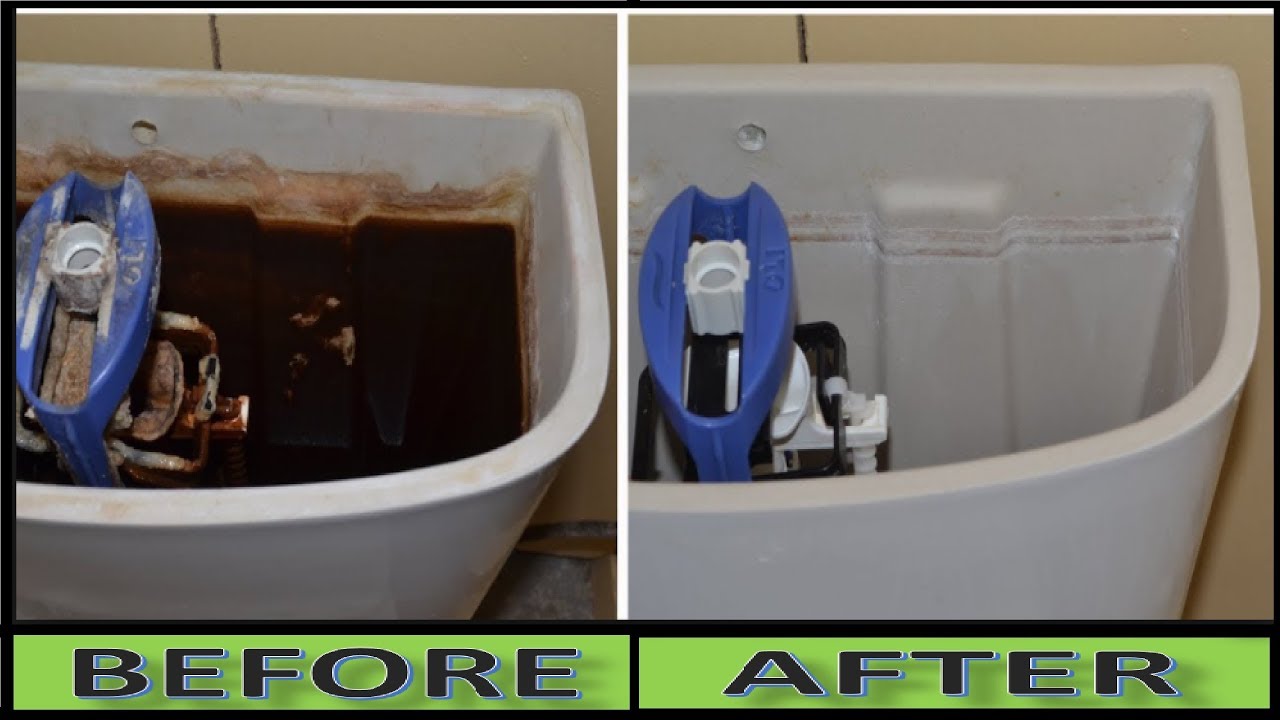
The toilet tank can hold water for days. This creates a perfect place for bacteria and mold. These cause bad smells in your bathroom. Stains may form inside the tank and spread to the bowl. Cleaning removes this buildup, keeping the toilet smelling clean. It also stops unsightly stains from appearing.
Improving Flush Efficiency
Minerals and debris can block parts inside the tank. This makes the flush weak or incomplete. Cleaning clears these blockages. A clean tank means stronger and more effective flushing. This helps waste clear away quickly. A good flush also reduces water waste.
Extending Toilet Lifespan
Parts inside the tank wear down faster when dirty. Corrosion and buildup cause damage over time. Regular cleaning protects these parts. It helps them work properly longer. This lowers the chance of needing costly repairs or a new toilet. A clean tank means a longer-lasting toilet.
Credit: www.youtube.com
Tools And Supplies Needed
Cleaning a toilet tank requires the right tools and supplies. Having everything ready makes the job easier and faster. It also helps keep the cleaning safe and effective. Below are the key items you need for this task.
Cleaning Agents
Use a mild cleaner to remove dirt and buildup. White vinegar is a popular choice because it breaks down mineral deposits. Baking soda works well with vinegar to scrub stains. Avoid harsh chemicals that can damage tank parts. A gentle bathroom cleaner can also help.
Protective Gear
Wear gloves to protect your hands from germs and cleaners. Safety goggles prevent splashes from reaching your eyes. Old clothes or an apron keep your clothes clean. Proper protection keeps you safe during the cleaning process.
Basic Tools
Bring a scrub brush or an old toothbrush for scrubbing inside the tank. A sponge or cloth helps wipe surfaces clean. A bucket is useful for flushing out dirty water. Have a towel handy to dry any spills. These simple tools make cleaning easier and more thorough.
Preparing For Cleaning
Preparing to clean your toilet tank is important for a smooth and safe process. Taking a few simple steps first can save time and avoid messes. These steps help protect your bathroom and make cleaning easier.
Shutting Off Water Supply
Locate the water valve behind the toilet. Turn the valve clockwise to stop water flow. This prevents the tank from refilling during cleaning. Check that no water is entering the tank by flushing once.
Emptying The Tank
Flush the toilet to drain most of the water. Use a sponge or towel to soak up any leftover water inside. A dry tank helps cleaning solutions work better and stops spills.
Ventilating The Area
Open a window or turn on the bathroom fan. Fresh air reduces strong smells from cleaning products. It also helps the area dry faster after cleaning.

Credit: www.harpic.co.in
Step-by-step Process – How to Clean Toilet Tank
Cleaning the toilet tank is simple with a clear process. Follow these easy steps for a fresh, well-maintained tank. Each step helps remove dirt and build-up inside the tank. This keeps your toilet working well and smelling clean.
Removing The Tank Lid
First, carefully lift the tank lid. Place it on a flat surface where it won’t fall. Be gentle to avoid cracks or chips. Check the tank water level before starting the cleaning.
Scrubbing The Interior Walls
Use a soft brush or sponge to scrub the tank walls. Focus on areas with stains or mineral build-up. Avoid harsh tools that can damage the tank surface. A mild cleaner or vinegar helps break down grime.
Cleaning The Flush Mechanism
Inspect the flush handle, chain, and flapper inside the tank. Remove any dirt or deposits with a soft cloth. Check for wear or damage. Clean parts help the toilet flush smoothly and save water.
Rinsing The Tank
Turn on the water supply and let the tank fill. Flush the toilet a few times to rinse out loosened dirt. If needed, repeat scrubbing and rinsing for a thorough clean. Replace the tank lid securely after cleaning.
Dealing With Stubborn Stains And Deposits
Stubborn stains and deposits in the toilet tank can be tough to remove. These build-ups may include hard water stains, rust, and mineral deposits. They affect the tank’s function and look unpleasant. Cleaning these requires the right approach and materials. Gentle yet effective methods work best to protect the tank and keep it clean.
Using Vinegar And Baking Soda
Vinegar and baking soda create a natural cleaning duo. Pour about two cups of white vinegar into the tank. Let it sit for at least one hour. The vinegar helps dissolve mineral deposits and stains. Then add half a cup of baking soda. It fizzes and lifts grime gently. Scrub the tank walls with a soft brush. Flush to rinse thoroughly. This method is safe and affordable.
Applying Commercial Cleaners
Commercial cleaners offer stronger stain removal. Choose a cleaner made for toilet tanks. Read the label carefully before use. Apply the cleaner according to instructions. Let it soak for the suggested time. Use a soft brush to scrub stubborn spots. Flush the tank several times to clear residue. These cleaners work fast but use with care.
Avoiding Harsh Chemicals
Harsh chemicals can damage tank parts. Avoid bleach, ammonia, and strong acids. These can corrode metal and plastic components. They may also harm the toilet’s flushing system. Choose mild cleaners or natural solutions instead. Protect your toilet and plumbing by using gentle products. Safe cleaning keeps your toilet tank in good shape.
Reassembling And Testing
After cleaning the toilet tank, it is important to carefully put everything back together. This step helps avoid leaks and ensures your toilet works well. Take your time with each part and check for problems.
Replacing The Lid
Place the toilet tank lid gently back on top. Make sure it fits snugly and sits flat. Avoid dropping or sliding it roughly to prevent cracks.
Turning Water Back On
Locate the shut-off valve near the base of the toilet. Slowly turn the valve counterclockwise to open it. Listen for water filling the tank and watch for leaks around the connections.
Checking For Proper Flush
Flush the toilet a few times to test the system. The water should flow smoothly and refill quickly. Look inside the tank to see if the parts move correctly and the water stops at the right level.
Maintenance Tips
Keeping your toilet tank clean helps your toilet work well. It also stops bad smells and stains. Following some simple maintenance tips can save time and money. It keeps your bathroom fresh and hygienic.
Regular Cleaning Schedule
Clean the toilet tank every three to six months. This prevents dirt and mold buildup. Use a soft brush and mild cleaner to scrub inside the tank. Avoid harsh chemicals that can damage the parts. A regular schedule keeps your toilet flushing smoothly.
Using Tank Tablets Safely
Tank tablets help reduce stains and buildup. Choose tablets made for toilet tanks only. Avoid bleach tablets as they may harm the tank parts. Follow the instructions on the package carefully. Use tablets occasionally, not as the main cleaning method.
Signs It’s Time To Clean Again
Look for cloudy water or bad smells from the tank. Rust or slime inside the tank also signals cleaning time. If the toilet flushes weakly, the tank might have buildup. Regular checks help catch problems early and keep your toilet fresh.
Frequently Asked Questions
How Often Should I Clean My Toilet Tank?
Cleaning your toilet tank every 6 months prevents buildup and keeps it functioning well. Regular cleaning stops mold, rust, and mineral deposits from damaging parts. It also improves water quality and flushing efficiency.
What Supplies Do I Need To Clean A Toilet Tank?
You need rubber gloves, a sponge or scrub brush, white vinegar, baking soda, and a bucket. Optional supplies include a toothbrush for tight spots and a towel to catch drips. Avoid harsh chemicals that can damage tank parts.
Can Vinegar Safely Clean Toilet Tanks?
Yes, white vinegar is a safe, natural cleaner for toilet tanks. It dissolves mineral deposits and kills bacteria without harming rubber or metal parts. Let vinegar sit for 15-30 minutes before scrubbing to loosen grime effectively.
Should I Turn Off Water Before Cleaning The Tank?
Yes, always turn off the water supply before cleaning the toilet tank. This prevents water from refilling and spilling during cleaning. After turning off, flush to empty the tank, making it easier to scrub inside.
Conclusion
Cleaning your toilet tank keeps your bathroom fresh and running well. Regular care stops build-up and bad smells. It also helps your toilet save water and work better. Use simple tools and safe cleaners for the job. Take your time and follow easy steps.
A clean tank means a cleaner, healthier home. Try this routine often to avoid big problems later. Your toilet will thank you with every flush.


Leave a Reply